
Absolute beginner guide • MeshAdv Pi HAT • Raspberry Pi

MESHADV PI HAT: START FROM ZERO.

Never used Linux? Never touched a Raspberry Pi? Don't know what SSH, SPI, UART or YAML mean? This guide assumes you know none of it and walks you from parts on a table to a working 1 watt Linux-native Meshtastic node.

No coding required1 watt / 30 dBm-class LoRaDesktop or SSHTroubleshooting included
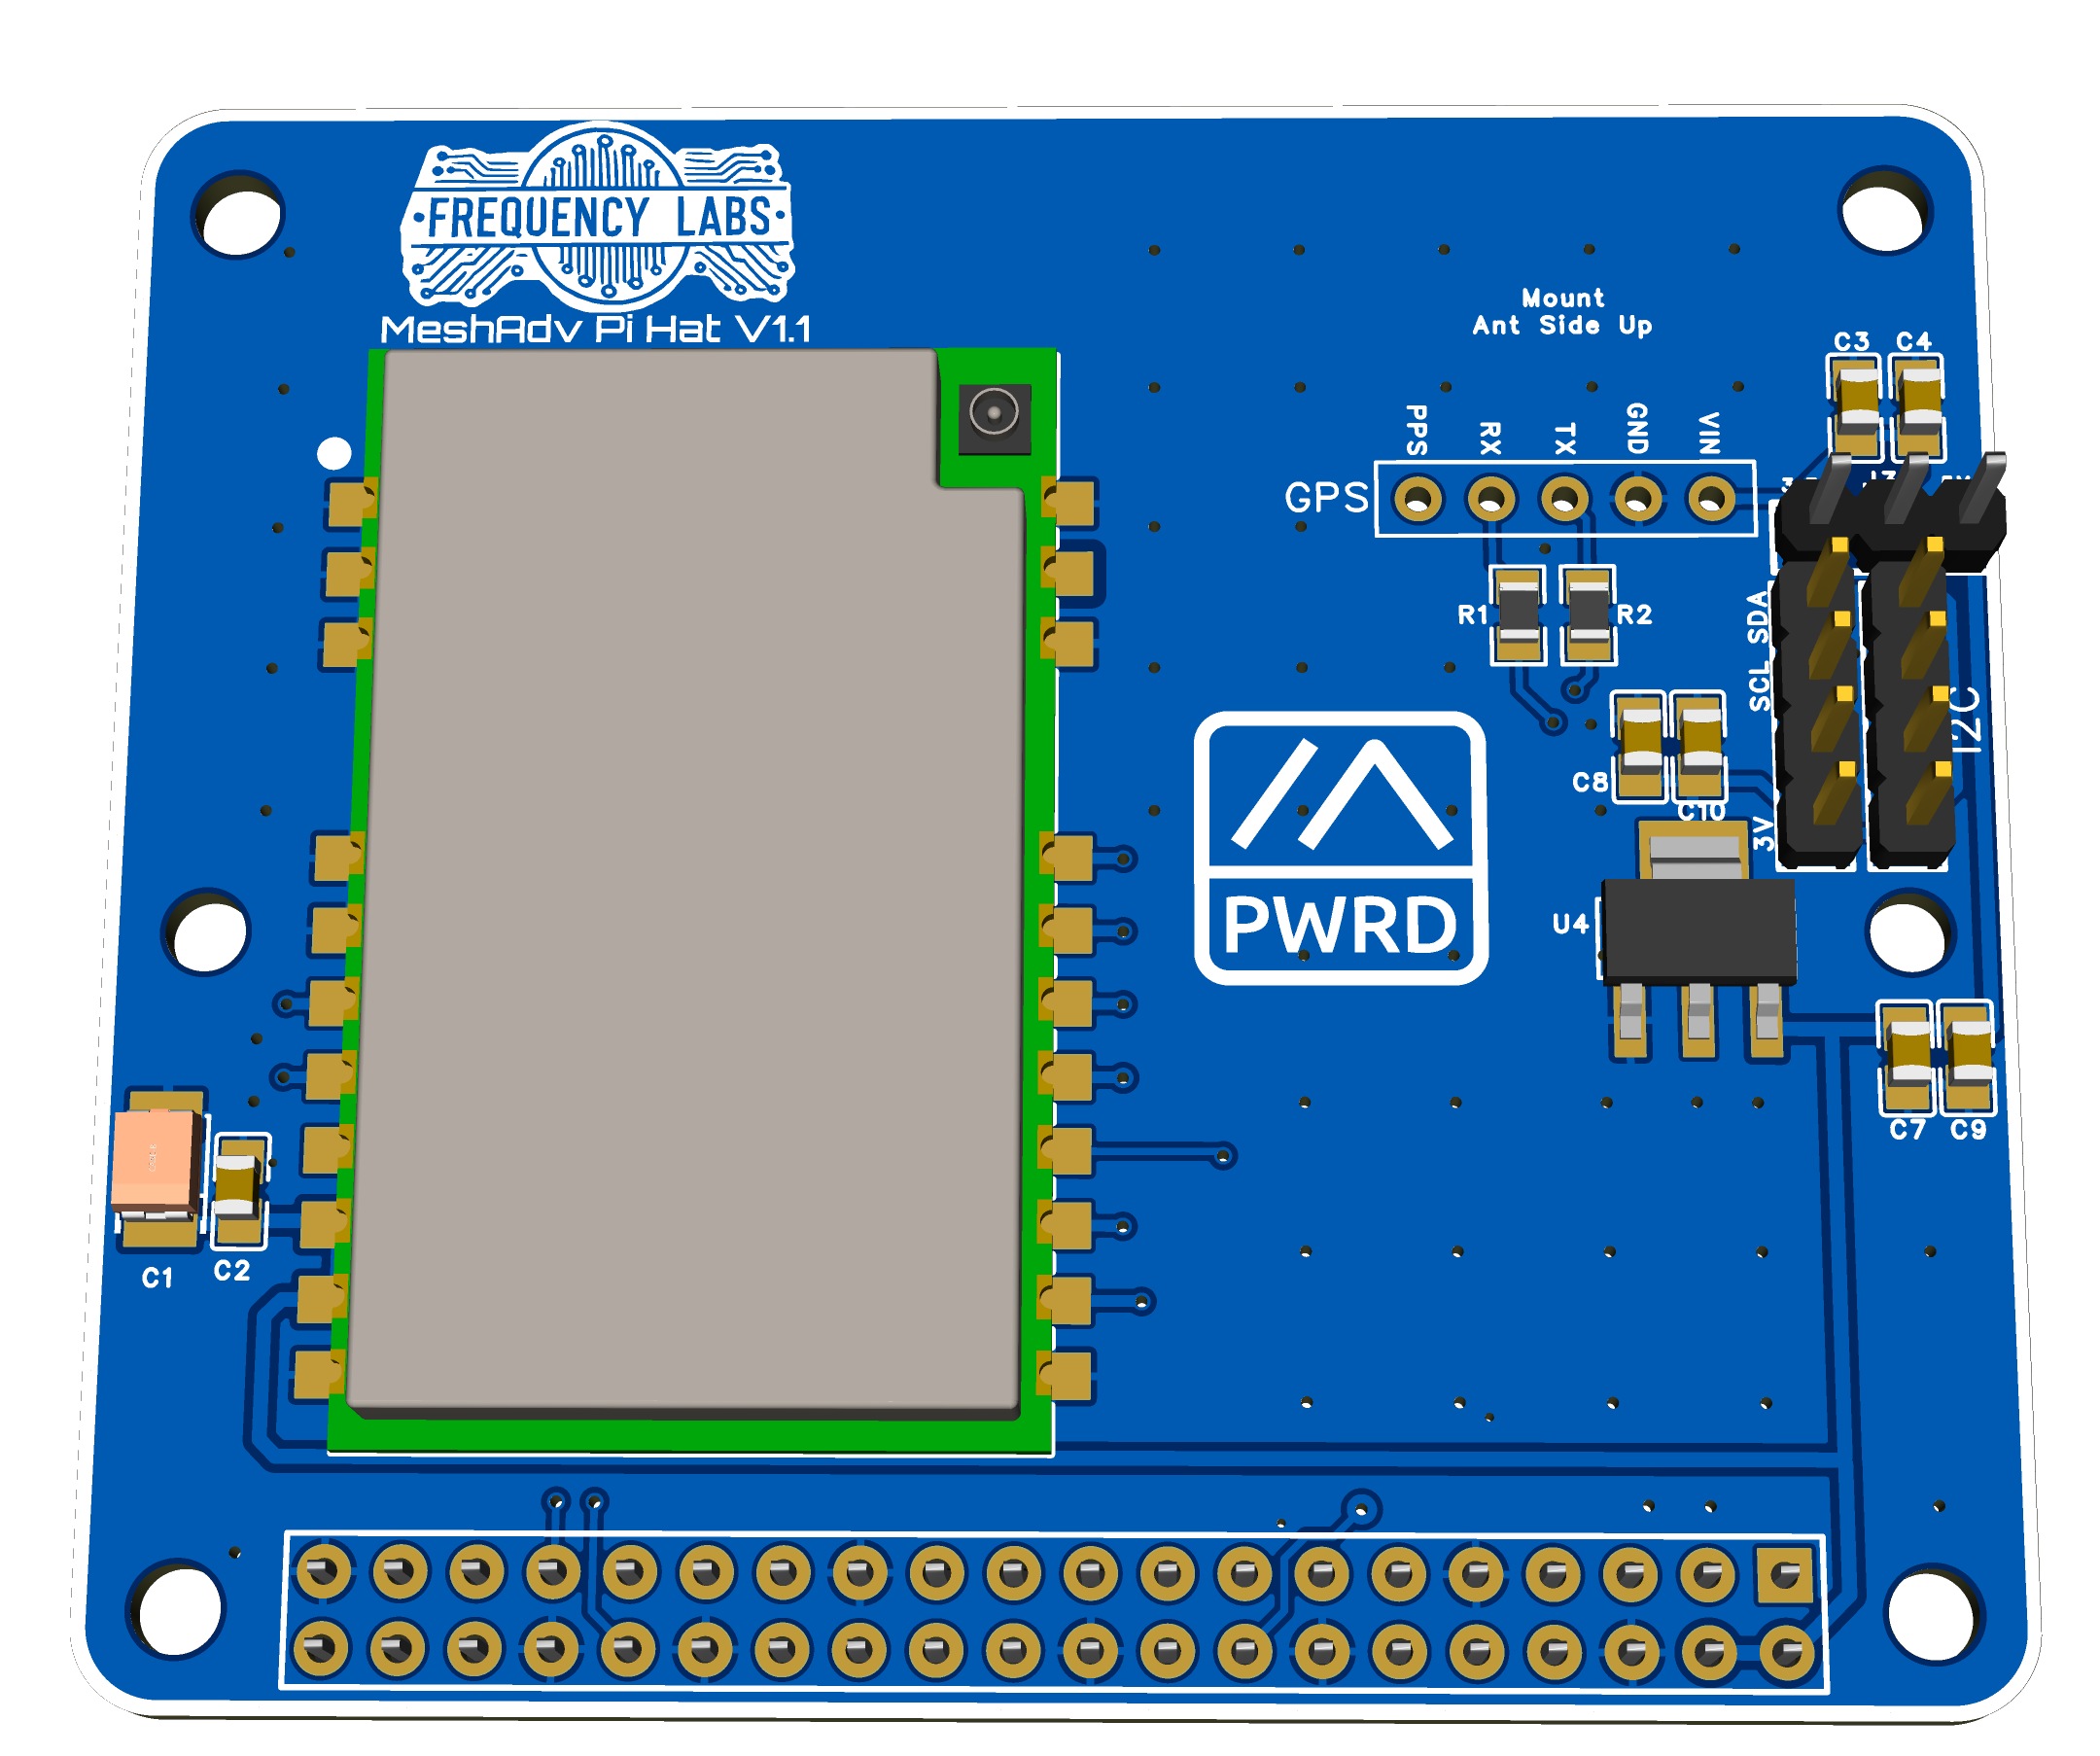
MeshAdv Pi HAT v1.1 top view
⚠️ ANTENNA FIRST. POWER SECOND.

The MeshAdv Pi HAT project specifically warns that an antenna must be connected whenever the HAT is powered. Powering the E22 LoRa module without an antenna can damage it.

Before plugging power into the Raspberry Pi, verify the correct LoRa antenna is attached.

What are we actually building?

The Raspberry Pi is the computer. The MeshAdv Pi HAT adds the LoRa radio and optional GPS hardware. The Pi runs meshtasticd, the Linux-native version of Meshtastic. This setup is especially useful for base stations, routers, remote infrastructure, PoE-powered locations and MQTT-connected nodes.

What you need

PUT THESE THINGS ON THE TABLE.

Compatible Raspberry PiThe upstream project lists Pi 2, 3, 4, 5, 400, 500 and the Zero family as compatible. The current configuration helper supports Pi 2/3/4/5, 400/500 and Zero 2 W.
MeshAdv Pi HATThe full-size 1 watt LoRa HAT from Chris Myers / Frequency Labs.
Correct LoRa antennaFor a U.S. 915 MHz build, use a suitable 915 MHz antenna rated for the system.
microSD cardStores Raspberry Pi OS and meshtasticd.
Correct Pi power supplyUse a supply appropriate for your exact Pi model and accessories.
Internet connectionWi-Fi or Ethernet is needed to install packages and the setup tool.
Know what you're looking at

THE HAT, IN PLAIN ENGLISH.

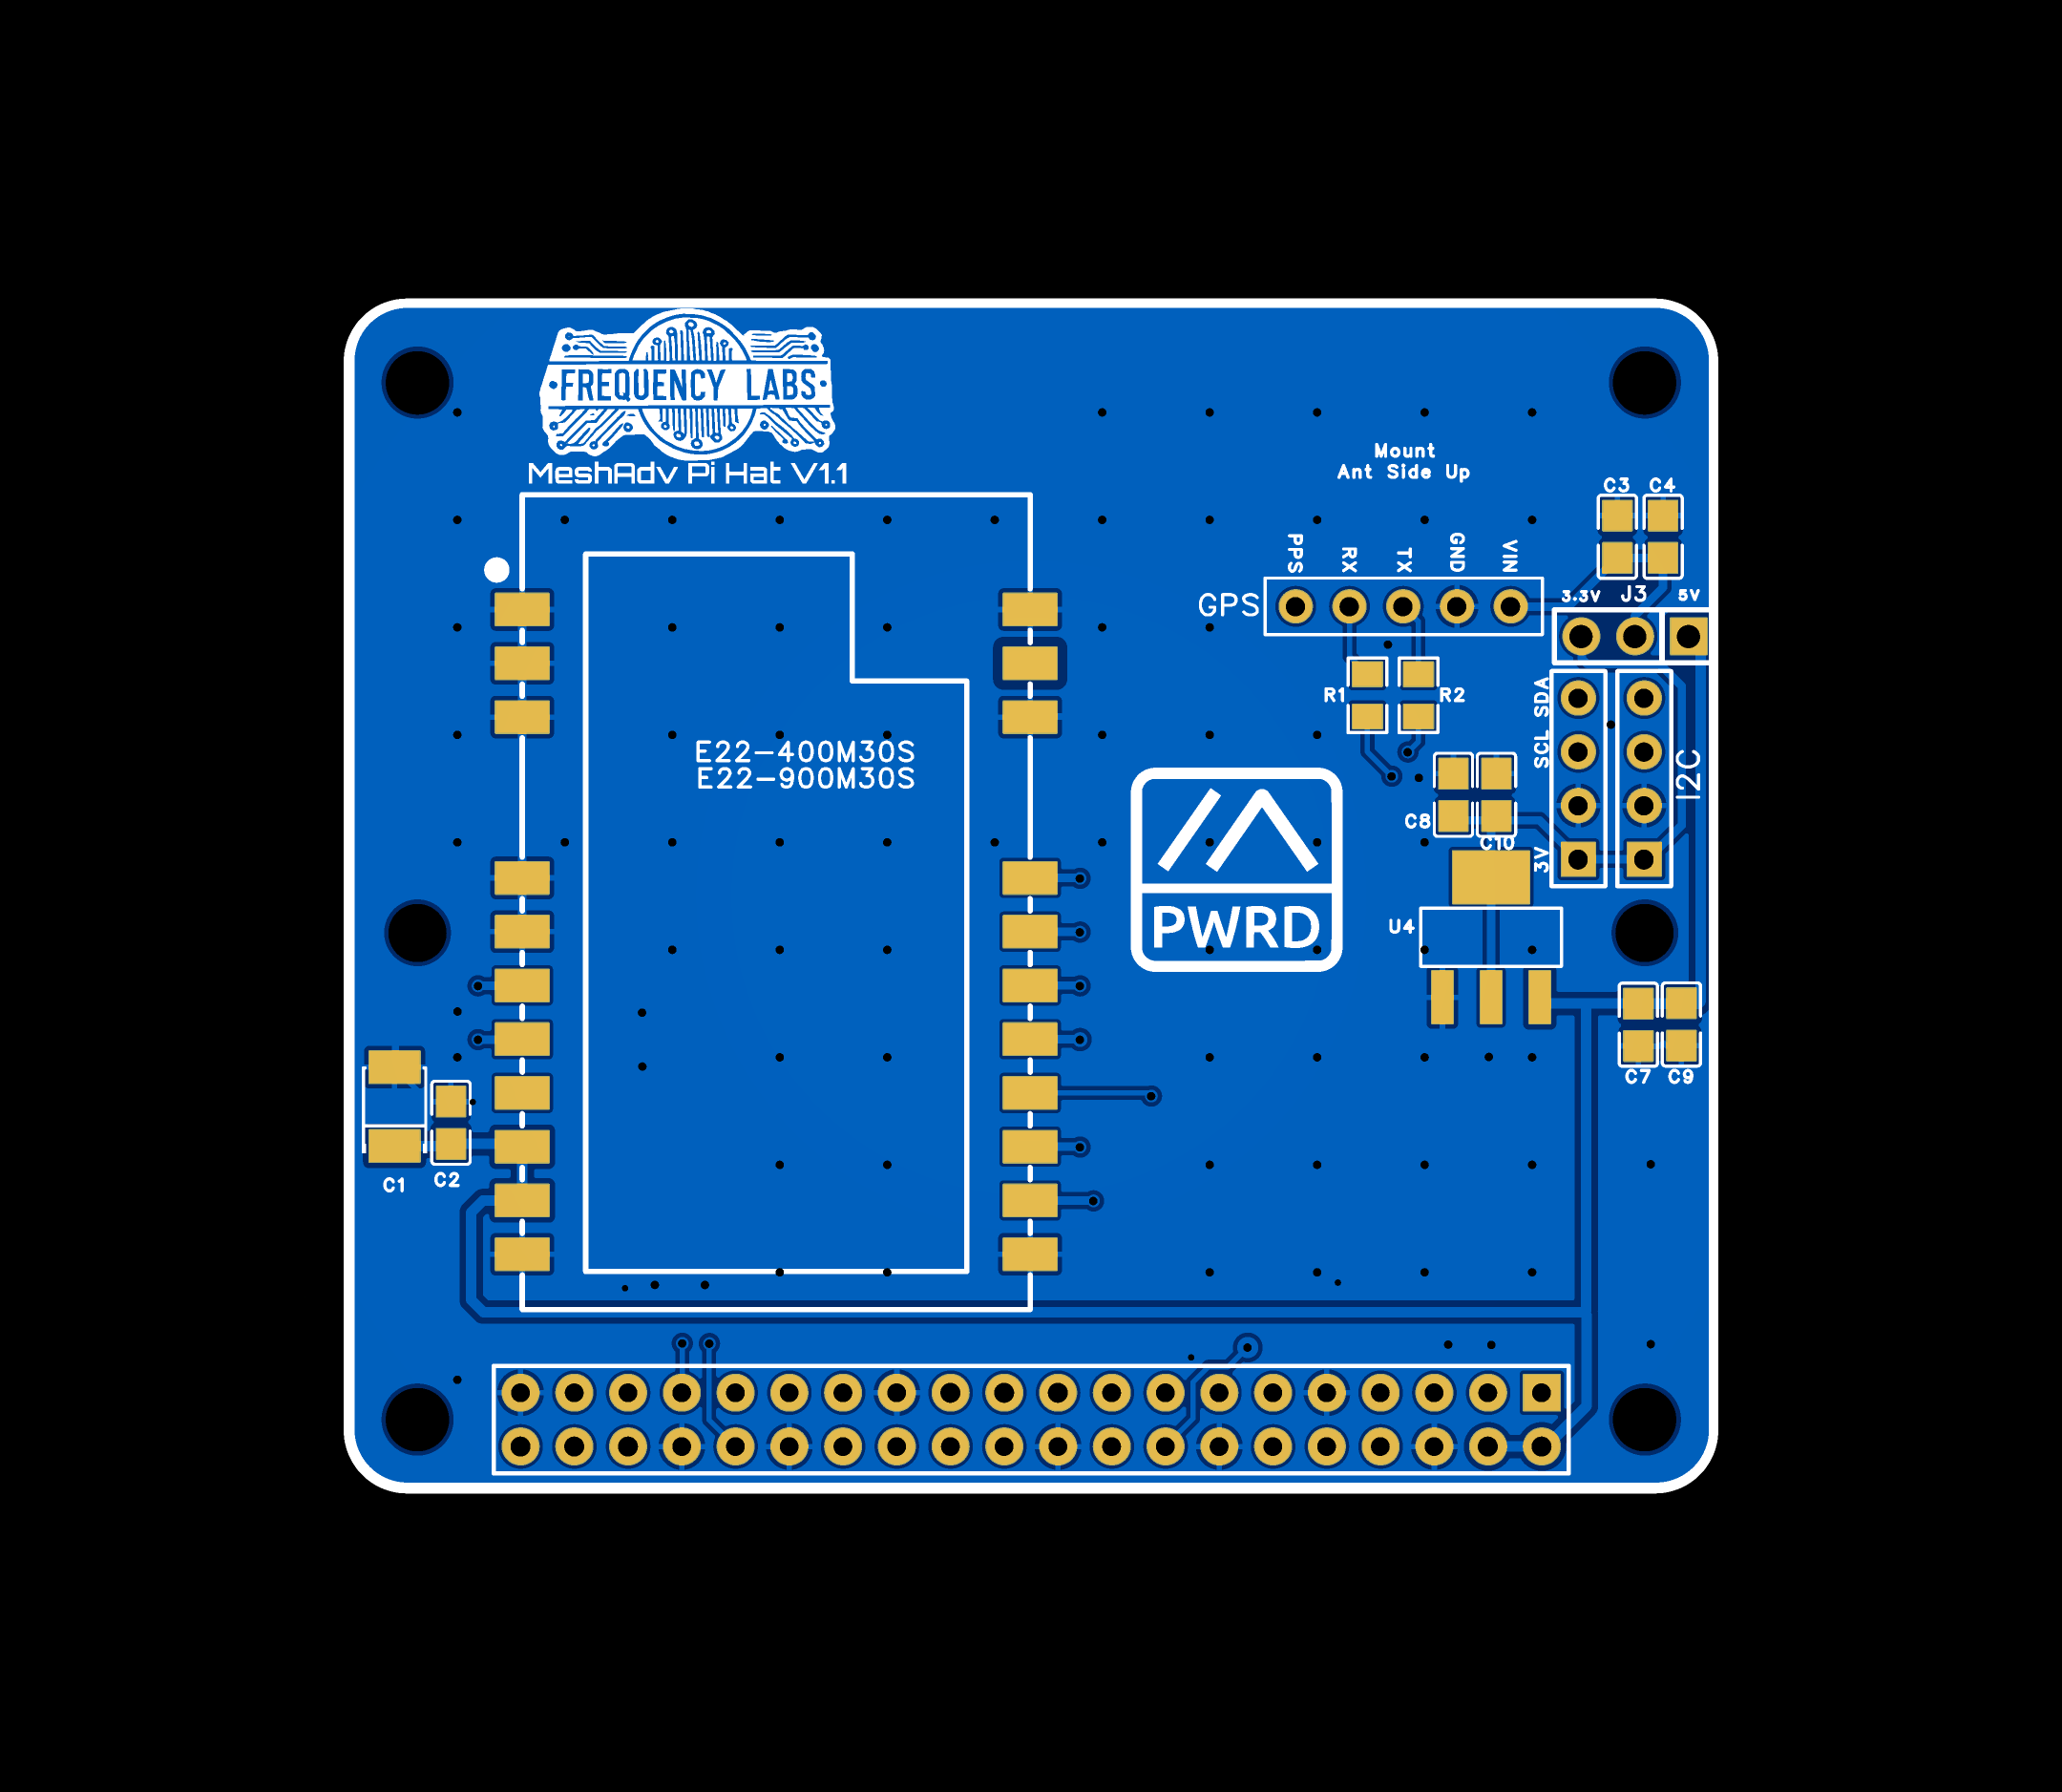
MeshAdv Pi HAT v1.1 board view
1LoRa radio pathThis is the high-power radio side. Antenna-before-power matters here.
240-pin Pi headerThe HAT connects to the Raspberry Pi through the standard 40-pin GPIO header.
3GPS areaThe board has space for a GPS module and routes UART/PPS signals for compatible modules.
4I²C breakoutOptional expansion for sensors and accessories. Ignore it for your first radio test.

Board images are from the MeshAdv Pi HAT project repository. Always verify your exact board revision against the upstream documentation.

1
Install Raspberry Pi OS

GIVE THE PI AN OPERATING SYSTEM.

Use the official Raspberry Pi Imager to write a current Raspberry Pi OS image to your microSD card.

✓ Set Wi-Fi if you're using Wi-Fi.
✓ Create a username and password.
✓ Use a simple hostname such as meshadv.
✓ Enable SSH if offered.
SSH in one sentence:

SSH lets you control the Pi from another computer over your network instead of attaching a keyboard and monitor.

2
Install the hardware

PI OFF. HAT ON. ANTENNA ON. THEN POWER.

  1. Shut the Raspberry Pi down completely and unplug power.
  2. Carefully align the HAT with the Pi's 40-pin connector.
  3. Press it straight down without offsetting the pins.
  4. Attach the LoRa antenna.
  5. Check the antenna again.
  6. Only then power the Pi.
Do not install, remove or reposition the HAT while the Raspberry Pi is powered.
3
Open a terminal

THIS IS THE ONLY “LINUX-LOOKING” PART.

Monitor + keyboardBoot Raspberry Pi OS and open Terminal.
SSH / headlessConnect to the hostname you created, commonly something like meshadv.local.
Lots of textNormal. The terminal is just where you paste the commands below.
4
Install the Frequency Labs helper

LET THE CONFIGURATION TOOL DO THE BORING STUFF.

The Frequency Labs configuration utility can install meshtasticd, enable Raspberry Pi hardware interfaces, select the HAT configuration and control the service.

curl -fsSL https://raw.githubusercontent.com/chrismyers2000/Meshtasticd-Configuration-Tool/refs/heads/main/install.sh | bash

Start the tool

python3 ~/meshadv-config/meshadv-config.py

The helper automatically uses a graphical interface on a Pi desktop and a terminal interface over SSH.

🚨 “NO HAT DETECTED” IS NORMAL FOR THIS BOARD.

The MeshAdv Pi HAT v1.1 does not have the HAT+ EEPROM used by the Mini and Pro. The configuration tool may report no HAT detected and default to MeshAdv Pi HAT v1.1. That does not mean the board is missing or broken.

5
Configure it

DO THESE IN ORDER.

A. Install meshtasticd

Choose Install / Remove meshtasticd and install the Stable release unless you specifically need a test channel.

B. Enable SPI

Choose Enable SPI. SPI is how the Pi talks to the LoRa radio.

C. Enable I²C

Choose Enable I2C. This supports the board's I²C expansion path.

D. Enable GPS / UART if you're using GPS

The tool enables UART and sets the GPS serial path for your Pi model. Pi 5/500 use /dev/ttyAMA0; earlier supported Pi models use /dev/ttyS0.

E. Set the HAT config

Choose Set Hat Config and select the recommended MeshAdv Pi HAT v1.1 file:

lora-MeshAdv-900M30S.yaml
Reboot required?

Expected. Reboot before troubleshooting.

sudo reboot
6
After reboot

OPEN THE TOOL AGAIN.

If you were using SSH, reconnect and run:

python3 ~/meshadv-config/meshadv-config.py

Check that SPI, I²C and your HAT configuration show the settings you selected.

7
Set the radio region

DO NOT SKIP THIS.

Install the Meshtastic Python CLI through the helper if required, then use Set Region.

United States?

Select the U.S. region for a node physically operating in the United States. If the node is elsewhere, use the legal region for that location.

Then choose Enable on Boot and Start Service.

8
Test it

CHECK STATUS. SEND A MESSAGE.

Open Service Status. You want meshtasticd running without a repeating fatal error.

Then use the helper's Send Test Message action.

If the test message sends, your basic node is working.

Stop there for a minute. Prove basic RF operation before adding MQTT, dashboards, GPS timing or other services.

Optional GPS

GET THE RADIO WORKING FIRST. ADD GPS SECOND.

The MeshAdv Pi HAT supports an external UART GPS module. The upstream project recommends the ATGM336H and notes that jumper J3 selects 3.3 V or 5 V for the GPS.

Voltage mattersSet J3 to the voltage required by your specific GPS module. Do not guess.
Serial path mattersPi 5 uses /dev/ttyAMA0; earlier Pis typically use /dev/ttyS0 in the upstream configuration.
PPS is advancedV1.1 boards produced from January 1, 2025 route GPS PPS to GPIO 23 / physical pin 16. You do not need PPS for a basic Meshtastic node.
Something went wrong?

BEGINNER TROUBLESHOOTING.

The tool says no HAT detected
For MeshAdv Pi HAT v1.1, this is normal because the board does not have a HAT+ EEPROM. Select the MeshAdv Pi HAT v1.1 configuration manually.
The radio isn't working
Verify the antenna is connected, SPI is enabled, lora-MeshAdv-900M30S.yaml is selected, you rebooted after interface changes, and meshtasticd is running.
meshtasticd will not start
Check Service Status. Confirm the correct HAT config and region are set, then reboot once before making random manual edits.
GPS doesn't work
Confirm GPS/UART was enabled, the GPS module voltage matches J3, the serial path matches your Pi model, and test with a clear view of the sky.
An old YouTube video tells me to edit config.yaml
The upstream README explicitly marks the older manual process as the old method and points users toward the current configuration tool and official Meshtastic Linux-native documentation first.
Do not do these

SIX EASY WAYS TO MAKE THIS HARDER.

✕ Do not power the HAT without its antenna.
✕ Do not assume “no HAT detected” means failure.
✕ Do not copy the Mini's YAML file onto this HAT.
✕ Do not copy GPIO values from another board.
✕ Do not use a random region setting.
✓ Get basic radio operation working before advanced add-ons.
Credit & source of truth

THIS GUIDE SUPPLEMENTS THE PROJECT — IT DOESN'T REPLACE IT.

MeshAdv Pi HAT is a project by Chris Myers / Frequency Labs. No Bars Club did not design or manufacture the hardware.

MeshAdv Pi HAT official GitHub ↗
Frequency Labs meshtasticd Configuration Tool ↗
Official Meshtastic Linux-native documentation ↗

Hardware revisions and installation methods can change. When this page and current upstream documentation disagree, use the upstream documentation and report the mismatch so this page can be corrected.